Creating a Photoshop Tutorial

Background
The key to a good tutorial is to make it look like you were able to sit in front of your computer and perform the task as though you were doing it in real time, and that you were able to do it in one take. This is not the case however, and there is a lot of preparation to do beforehand to achieve this effect.When creating a tutorial of any kind, it is important to first establish your target audience. What is it that you will be showcasing? How is it going to benefit the viewer? These are the two main questions you should ask yourself before you even begin to create your tutorial. Once you have established what you will be doing and who it is for , you should begin by creating a script. There are many different ways to do this, but I recommend performing the actions you will be taking during the tutorial one step at a time, and writing out exactly what you did, what you will say, and having a screenshot of what things will look like at this stage. Below is an example of a working script that I created in Microsoft Word.
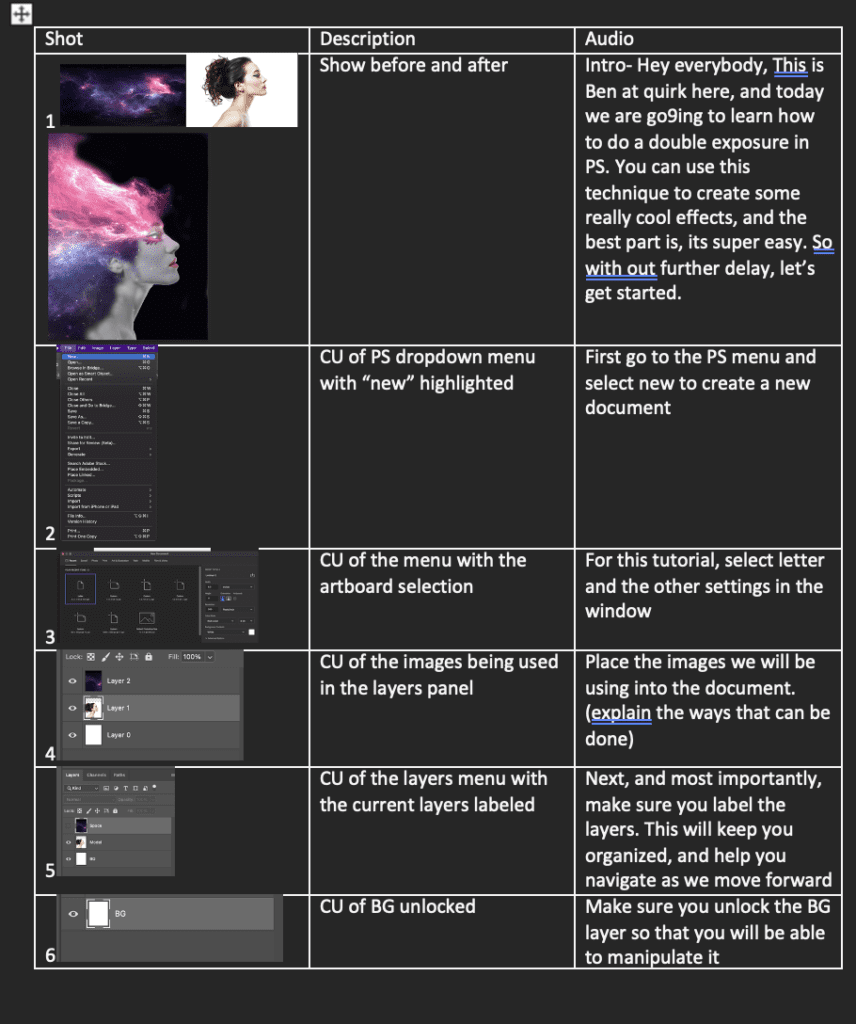
This gives you as the author a chance to see where you are in the creation process, and helps prevent you from omitting important information. It also helps you to frame out what you will be doing and the way the screen will be framed at different points in the tutorial. Once you have completed this, you are able to better visualize what your tutorial will look like, and can make adjustments from there. If this were an academic paper, it helps to think of this portion as a first draft.
Audience
As I mentioned earlier, establishing your target audience is crucial to the success of your tutorial. I chose to do my tutorial on the brush tool in Photoshop, and targeted it towards the beginner. This is important because I wanted to make sure that I was very deliberate in all my actions to avoid confusion between myself and the viewer. I had to take the stance of the viewer knowing nothing about Photoshop and make sure everything I did was explained so they would be easily able to follow along. I included practical applications that, although a little more advanced, shows how this tool can be used in future projects. I wanted to make sure that the audience could see how this could be useful, and not just the boring monotony of the basic functions of the tool.
Challenge
The mistake most people, including myself, make when they view a tutorial, is thinking that by the end of it they will be a master of the technique they just learned and be able to create mind-blowing images. In some of the more advanced tutorials that is true, but one must first have a solid foundation before they are able to perform those tasks. One of the main challenges was how do I keep the audience engaged when the baseline content isn’t all that exciting? By adding some soft background music, it helps the video flow. Even though the content might not be on the expert level, by having some music, I can keep the audience’s attention while explaining the basics. I used some examples of what was possible with this tool to show why understanding it is important. In addition, it was important to keep in mind what information should be displayed on screen and at what time during the tutorial.
Solution
The way that I solved the problem of creating this tutorial for the newcomer to Photoshop was by having proper planning, and practicing what I would do and say so that the audience was able to understand and replicate the actions performed in the video. I had to remember what I went through when I was first learning the software, and how overwhelming all of the tools can be. There are multiple functions to everything, and knowing what they do and why I would use them are crucial in the creative process. One other thing I had to keep in mind was that the viewer is not able to ask questions about what I am doing, so I had to make sure that whatever I did was carefully explained in a way that someone unfamiliar with the software could understand. I didn’t want to over explain the full capabilities of the tools and software. I have noticed in many “beginner” tutorials there is an incredible amount of information that isn’t relevant to what is being shown in the video. I made sure that I stayed on topic and only covered what I was doing. By using the video editing functions of Screenflow, I was able to highlight the pertinent information on screen while I was explaining the process. After I was able to compile all my information and do several walkthroughs of the tutorial, I was able to compile a cohesive and complete, step-by-step instruction of how the brush tool can be used. The most important part of this process is practice. It may take several attempts to get things right, but in the end you will have a much better product.
Paper Prototype
This process started in a very non-graphic way. I created a list of actions using a Miro board and sticky notes. The idea was to target who i was talking to, what they would do, and how they would do it. This is the process that was even before the scripting process.
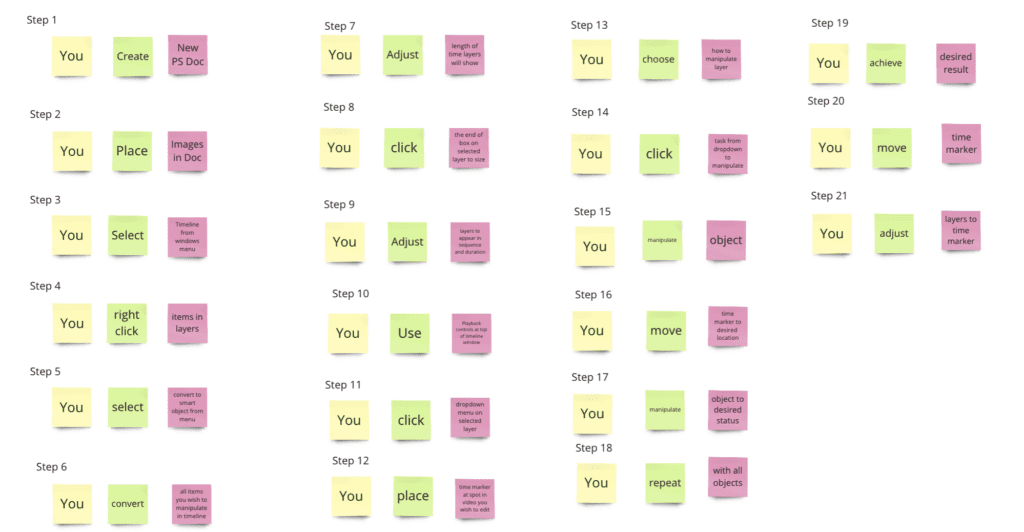
I am aware that this looks incredibly tedious and boring, and you aren’t 100% wrong, but the benefits of doing this allow for a much smoother script writing process. It also helps you to better visualize what information you need to include, or can omit, so that your tutorial is as effective as possible.
Digital Prototype
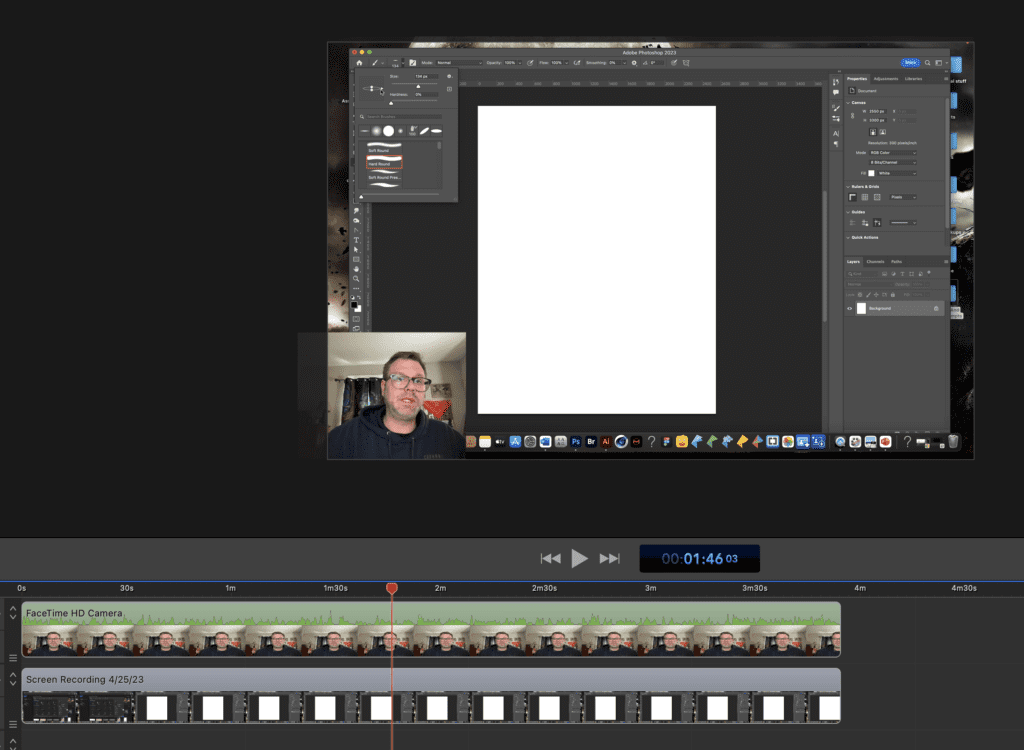
This is what things looked like at the very beginning of the tutorial process. I had a very basic audio track with a picture-in-picture display of me explaining what was on screen. I had a strong script, but what I was attempting to do was go through the process in real time while explain what I was doing on screen. The end result was less than satisfactory. I decided to compile all of the steps in the video without a voice over, and made sure to allow for breaks to fill in the speech afterwards. This allowed for me to focus on one aspect of the video at a time, and make sure I contained all the information I needed without having to try to multitask. Be adding extra steps to the process I was able to create a much more informative and coherent video.
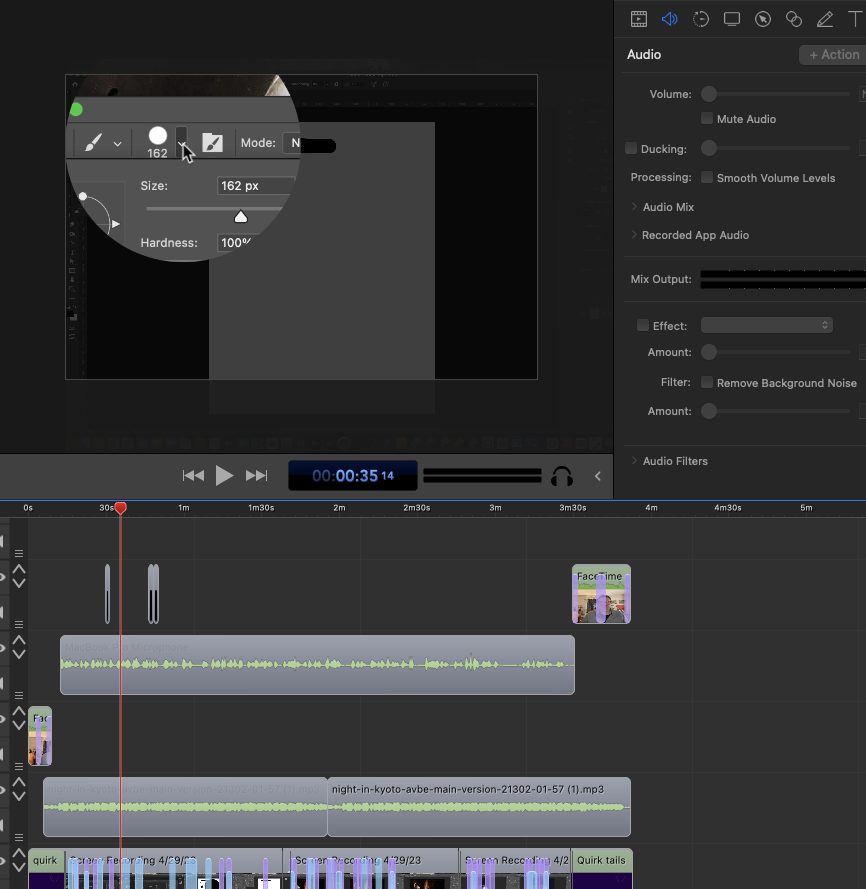
As you can see, There are additional tracks of audio and video. I recorded my voice over separately after completing the steps so I could allow for the proper space to showcase the tool without me talking over the steps. I also was able to edit the video so that the viewer’s attention is in the right place at the right time, As you can see by the callout in the above image. This process did take more time, but the end result was much more polished and targeted more towards the audience I was trying to reach.
Final Product
This is the finished product which is available to watch on my YouTube channel. Let me know what you think.